
Databases at Runtime with RadStudio
It can be advantageous to learn how to connect to a database through code alone for certain scenarios, server-side code for example, where a UI is not required. It’s also useful for separating your code (and therefore logic) from the UI, which is often a beneficial design practice.
Before we take a look at how this is done, you’ll need to have your database driver configured. I’m going to be using MySQL as the database, and I have previously blogged about setting up MySQL drivers to work with the RadStudio IDE. Please read this post first: Configuring RadStudio for MySQL
Connecting to the database.
Lets now start a new VCL application ( this could as easily be a multi-device or FMX/FireMonkey application ), and drop a button onto the main form.
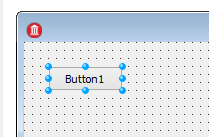
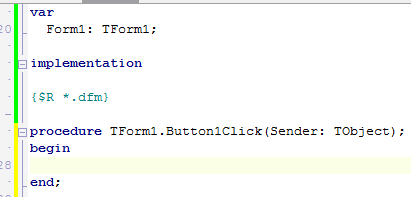
Double click on the button to enter it’s OnClick event
The first thing we’ll need in order to use the FireDAC, is to ‘uses’ the relevant units. Add the following units to your uses list…
FireDAC.Stan.Intf,  FireDAC.Stan.Option, FireDAC.Stan.Error,  FireDAC.UI.Intf, FireDAC.Phys.Intf,
FireDAC.Stan.Def, FireDAC.Stan.Pool,  FireDAC.Stan.Async,  FireDAC.Phys,
Data.DB, FireDAC.Comp.Client
We’ll actually need two more units, which I’ll get to in a moment. The above units are those added automatically by the IDE when you drop a TFDConnection component onto your form. TFDConnection is a class which represents our connection to the database.
Lets start by adding one of these to our code…
procedure TForm1.Button1Click(Sender: TObject);
var
  conn: TFDConnection;
begin
  conn := TFDConnection.Create(nil);
  try

  finally
    conn.Free;
  end;
end;
As you can see, I’ve added a connection called ‘conn’ to our button handler. In the first line I instance this connection and pass in ‘nil’ for the owner. For this reason I’m also using a try..finally block to ensure that the connection is disposed when we’re done with it.
Now lets provide the connection with the required details to connect to our database. Between the try..finally block, add this code…
try
    //- Connection parameters
    conn.Params.DriverID := 'MySQL';
    conn.Params.Add('Server=127.0.0.1');
    conn.Params.Database := 'world';
    conn.Params.UserName := 'embt';
    conn.Params.Password := 'embt';
    conn.LoginPrompt := False;
  finally
Most lines here should be pretty obvious, and you should replace the values with suitable values for connecting to your database. For the sake of this article, you should stick to using the ‘world’ database that ships with MySQL, but can select another if you’re confident that you know how to adjust the code.
There are one or two points of interest, so lets run through this code…
- conn.Params.DriverID := ‘MySQL’;
In this line we’re telling FireDAC that we’ll be using the MySQL database, and that it should look for the MySQL driver when attempting a connection. - conn.Params.Add(‘Server=127.0.0.1’);
In this line we’re telling FireDAC where it can find the database. Note that we’re adding this parameter manually, this is because the connection parameters have to adapt among several database engines, and this parameter is not common to all engines. - conn.Params.Database := ‘world’;
In this line we’re naming the database (or schema) that we’d like to connect to. - conn.Params.UserName := ’embt’;
In this line we provide a username for a user with permission to connect to the database (schema). - conn.Params.Password := ’embt’;
In this line we provide the password for the user that we named in the previous line. conn.LoginPrompt := False; This line tells FireDAC that, as we’re providing credentials for the connection, we don’t want a LoginPrompt to be presented to the application user. Leaving this defaulted to true, would cause your application to request a new username and password for the connection at runtime.
Now lets add a few more lines to make the connection to the database…
    //- Connect to the database..
    conn.Connected := True;
    if conn.Connected then begin
      ShowMessage('Connection succeeded.');
    end else begin
      ShowMessage('Connection Failed.');
    end;
In this code we set the Connected property of the connection to true. The property setter of the connection class will then call the connect method internally, which will initiate a connection with the database. Immediately after this line of code, we test the Connected property to confirm that a connection was made.
As you can see from the ShowMessage() lines, if the connection is made successfully you’ll see a message presented to confirm a connect to the database.
At this point, if you run the application and click the button, you’ll get an error message. Go ahead and try it, you should see an error resembling this one…
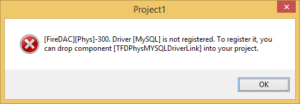
The reason for this error is that we didn’t yet include the MySQL specific units.
I wanted to show you this error message so that if you come across the same while connecting to some database other than MySQL you’ll know how to deal with it. The error message contains a class [TFDPhysMYSQLDriverLink] (this will vary for other databases). If you were to drop this component on the form from the tool palette, it would cause the IDE to include the required units in the uses list.
As we’re coding this manually without the designer however, we’ll manually include the required units. For MySQL add the following units to your uses list..
FireDAC.Phys.MySQLDef, FireDAC.Phys.MySQLNow run the application again and click the button.
This time, if all has gone well you’ll see a message stating ‘Connection succeeded.‘ If something goes wrong and you see ‘Connection Failed.‘ Go back and check your connection parameters are valid. For your reference, your code should look like this…
unit Unit1;

interface

uses
  Winapi.Windows, Winapi.Messages, System.SysUtils, System.Variants, System.Classes, Vcl.Graphics,
  Vcl.Controls, Vcl.Forms, Vcl.Dialogs, Vcl.StdCtrls;

type
  TForm1 = class(TForm)
    Button1: TButton;
    procedure Button1Click(Sender: TObject);
  private
    { Private declarations }
  public
    { Public declarations }
  end;

var
  Form1: TForm1;

implementation
uses
  FireDAC.Stan.Intf,
  FireDAC.Stan.Option,
  FireDAC.Stan.Error,
  FireDAC.UI.Intf,
  FireDAC.Phys.Intf,
  FireDAC.Stan.Def,
  FireDAC.Stan.Pool,
  FireDAC.Stan.Async,
  FireDAC.Phys,
  Data.DB,
  FireDAC.Comp.Client,
  FireDAC.Phys.MySQLDef,
  FireDAC.Phys.MySQL;

{$R *.dfm}

procedure TForm1.Button1Click(Sender: TObject);
var
  conn: TFDConnection;
begin
  conn := TFDConnection.Create(nil);
  try
    //- Connection parameters
    conn.Params.DriverID := 'MySQL';
    conn.Params.Add('Server=127.0.0.1');
    conn.Params.Database := 'world';
    conn.Params.UserName := 'embt';
    conn.Params.Password := 'embt';
    conn.LoginPrompt := False;
    //- Connect to the database..
    conn.Connected := True;
    if conn.Connected then begin
      ShowMessage('Connection succeeded.');
    end else begin
      ShowMessage('Connection Failed.');
    end;

  finally
    conn.Free;
  end;
end;

end.
Querying Data
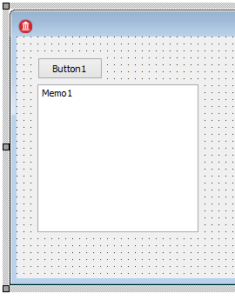
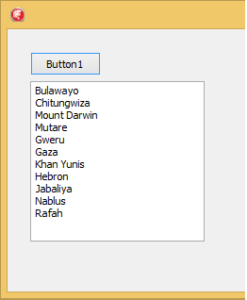
Now that we have a connection to our database, lets query some data from it. If you’re connecting to the world database which ships with MySQL, there is a table named ‘city’. We’ll query the city table for a list of cities, and add them to a Memo on our form (for verification). Add a TMemo to your form…
Back in the code, you’ll need to add two more uses. Again, failing to add these uses will give an error message which guides you either to the required unit, or to a class which can be added from the tool palette to find the required unit. I’ll save you that discovery and provide the unit names:
FireDAC.DApt, FireDAC.VCLUI.WaitAdd a variable to the var section of your ButtonClick procedure…
var
  conn: TFDConnection;
  qry: TFDQuery;
Replace the line which reads ” ShowMessage(‘Connection succeeded.’); ” with the following code…
      Memo1.Lines.Clear;
      qry := TFDQuery.Create(conn);
      try
        qry.Connection := conn;
        qry.SQL.Text := 'select * from city;';
        qry.Active := true;
        if qry.Active then begin
          if qry.RecordCount>0 then begin
            qry.First;
            while (not qry.Eof) do begin
              Memo1.Lines.Add(qry.FieldByName('Name').AsString);
              qry.Next;
            end;
          end;
        end;
      finally
        qry.Free;
      end;
Lets run through the more interesting code lines, and see what’s going on here…
- Memo1.Lines.Clear;
We start by clearing the memo on the form which will receive the data that we fetch from the database. - qry := TFDQuery.Create(conn);
Now we create an instance of the TFDQuery class, which is the class used to execute an SQL query against the database. I’m setting our connection as the owner of this class, so the query would be disposed when the connection is disposed, however, as good practice we’re going to free the control when we’re done with it. Though there are exceptions to this rule, if you’re just learning this you should always ensure you free database classes as soon as you’re done with them, as this frees up resources in the database engine. - qry.Connection := conn;
Here we tell the query class that it should connect to the database through the connection we prepared earlier. - qry.SQL.Text := ‘select * from city;’;
In this line we’re setting up an SQL query which will select all columns of data from the ‘city’ table of the database. - qry.Active := true;
This line causes the SQL query that we entered in the previous line to be executed against the database. if qry.Active then begin In this line we’re testing the Active property which we set to true in the previous line. If this property remains true, then our query was executed successfully. If this property returns to false, there was an error of some kind in the query. A failure will raise an exception which you could trap to examine the problem, but for the sake of this article we’ll simply fail silently in this case. - if qry.RecordCount>0 then begin
In this line we’re checking that at least one row (record) of data was returned from the database when our SQL query executed. If no data was returned, we do nothing. In our case though, there should be plenty of data… - qry.First;
Here we tell our query to position it’s cursor at the first row of data. The query cursor should already be at the first row of data, but there may be cases where this is not true, and so I like to call .First to manually ensure that the cursor is where it should be. while (not qry.Eof) do begin This while loop is set to loop through every row of data fetched by the query. The .EOF (end of file) property will return false until the cursor is positioned after the last row of data. - Memo1.Lines.Add(qry.FieldByName(‘Name’).AsString);
In this line we’re adding a string to the memo control on our form. We’re using qry.FieldByName() to locate the field named ‘Name’ which is the name of the city represented by this row of data. This returns a class of TField which has properties to access the data in various forms. (.AsString .AsInteger, .AsFloat) We’re using AsString because our memo expects string data. - qry.Next;
Don’t forget to put this line in the end of your while loop! This line tells the query to advance it’s cursor to the next row of data. If you omit this line, the while loop will never end, and your memo box will be flooded by repeated copies of the first city found by our query.
Phew, that was a sizable chunk of code to explain. Go ahead and test run your application now to see it bring back some data!
Using the TFDQuery class you can execute any kind of SQL string (SELECT, INSERT, UPDATE, DELETE) and even most DDL ( CREATE TABLE, ALTER TABLE etc…). Before you do, there are some more things that you should be aware of.
Firstly, we used the .RecordCount property in our code to ensure that more than zero rows of data were returned from our SELECT statement. If you are using INSERT, UPDATE or DELETE statements, you can see how many rows of data were affected with the .RowsAffected property. I just wanted to throw that in there in case you chose to leave this article now, without reading on.
Now I’d like to talk to you about parameters, but before I do, for your reference I’ll include our unit code once more…
unit Unit1;

interface

uses
  Winapi.Windows, Winapi.Messages, System.SysUtils, System.Variants, System.Classes, Vcl.Graphics,
  Vcl.Controls, Vcl.Forms, Vcl.Dialogs, Vcl.StdCtrls;

type
  TForm1 = class(TForm)
    Button1: TButton;
    Memo1: TMemo;
    procedure Button1Click(Sender: TObject);
  private
    { Private declarations }
  public
    { Public declarations }
  end;

var
  Form1: TForm1;

implementation
uses
  FireDAC.Stan.Intf,
  FireDAC.Stan.Option,
  FireDAC.Stan.Error,
  FireDAC.UI.Intf,
  FireDAC.Phys.Intf,
  FireDAC.Stan.Def,
  FireDAC.Stan.Pool,
  FireDAC.Stan.Async,
  FireDAC.Phys,
  Data.DB,
  FireDAC.Comp.Client,
  FireDAC.Phys.MySQLDef,
  FireDAC.Phys.MySQL,
  FireDAC.DApt,
  FireDAC.VCLUI.Wait;

{$R *.dfm}

procedure TForm1.Button1Click(Sender: TObject);
var
  conn: TFDConnection;
  qry: TFDQuery;
begin
  conn := TFDConnection.Create(nil);
  try
    //- Connection parameters
    conn.Params.DriverID := 'MySQL';
    conn.Params.Add('Server=127.0.0.1');
    conn.Params.Database := 'world';
    conn.Params.UserName := 'embt';
    conn.Params.Password := 'embt';
    conn.LoginPrompt := False;
    //- Connect to the database..
    conn.Connected := True;
    if conn.Connected then begin
      Memo1.Lines.Clear;
      qry := TFDQuery.Create(conn);
      try
        qry.Connection := conn;
        qry.SQL.Text := 'select * from city;';
        qry.Active := true;
        if qry.Active then begin
          if qry.RecordCount>0 then begin
            qry.First;
            while (not qry.Eof) do begin
              Memo1.Lines.Add(qry.FieldByName('Name').AsString);
              qry.Next;
            end;
          end;
        end;
      finally
        qry.Free;
      end;
    end else begin
      ShowMessage('Connection Failed.');
    end;
  finally
    conn.Free;
  end;
end;

end.
Using Parameters
Lets finish up this article with a quick look at parameters. Parameters look a lot like fields, however, they are values which may be passed into your SQL query before the query is executed. Back in the code, find the line in which we set the SQL text and replace it with these two lines …
    qry.SQL.Text := 'select * from city where ID=:ID;';
    qry.Params.ParamByName('ID').AsString := '12';
What we’ve done here is to add a ‘where’ clause to the SQL query which specifies which row of data to bring back based on it’s ID field. You’ll notice however, that we don’t hard-code a value for the ID field into the SQL, but instead we insert a place-holder ‘:ID’. In the second line of code we set the parameter named ‘ID’ to a hard-coded value (in this case 12).
Look at the ParamByName() method and notice how it is similar to FieldByName(). They work in a similar way, the real difference is that parameters are set before executing the query, and fields are set when the query is executed in order to return the data.
As a side note, you’ll see that I set the parameter ‘ID’ as a string in the above code. I could just as easily written the line as “ParamByName(‘ID’).AsInteger := 12;” but I wanted to demonstrate again that the data-type can be translated for you.
Go ahead and run this application, and click the button. You’ll notice that only a single record is returned as expected.
Conclusion
There are a number of additional methods and properties of the query class that we could look at, and of course, there are several other classes to chose from in the FireDAC framework. What I hoped to do in this article was to give you the basic building blocks needed to get started with databases in FireDAC, without the visual designer.
Perhaps I’ll revisit this subject later and cover some more advanced topics, but in the meanwhile I would encourage you to explore the TFDConnection, TFDQuery, and TFDTable classes for yourself.
Thanks for reading!