
Creating and Consuming Soap Services in Delphi

Today I'd like to show you how you can create and consume SOAP based web services. This is a frequent question from my customers, and so I've decided to write up the process here.
Edit: Delphi can consume any SOAP service as a client, however, the server-side SOAP services created using Delphi will be RPC based rather than Literal Document. This can cause problems consuming Delphi SOAP services from some clients. It's notably difficult with Java based clients, which requires the installation of older libraries. There appears to be little desire at Embarcadero to update the SOAP server, due to the decline in popularity of SOAP in favor of JSON/REST based services. If you wish to host services for use from Java, or some other development suite which is not compatible with RPC/SOAP, consider JSON/REST services which can be created using the Datasnap or EMS technologies from Embarcadero. -Edit Ends.
What is SOAP?
SOAP is short for Simple Object Access Protocol. That is, it's a protocol which enables your application to access 'objects', meaning data objects via their properties and methods. To put that into more straight forward terms, it's a protocol which enables you to access remote data, or call remote procedures. This is similar in many ways to the REST/JSON services that I've blogged about previously, however, SOAP data is transmitted using an XML wrapper, usually over a HTTP or direct TCP/IP. Another important difference between SOAP services and REST/JSON services is that SOAP services conform to a predefined contract which describes the data structures and methods available, this contract is described in WSDL file (Web Services Definition Language).
*Beware, some soap technology vendors forget what the letter 'S' in 'SOAP' stands for, naming no names.*
Creating a SOAP Service.
Lets create a SOAP service using Delphi. I'm using an early release of XE8, though I've been using these steps more-or-less unchanged since Delphi 7, so this should work in any version. That said, there was a major update to this technology in one of the earlier XE versions, so the most similar to my steps/screenshots will be XE4/5 or higher, but you should have little difficulty in previous versions.

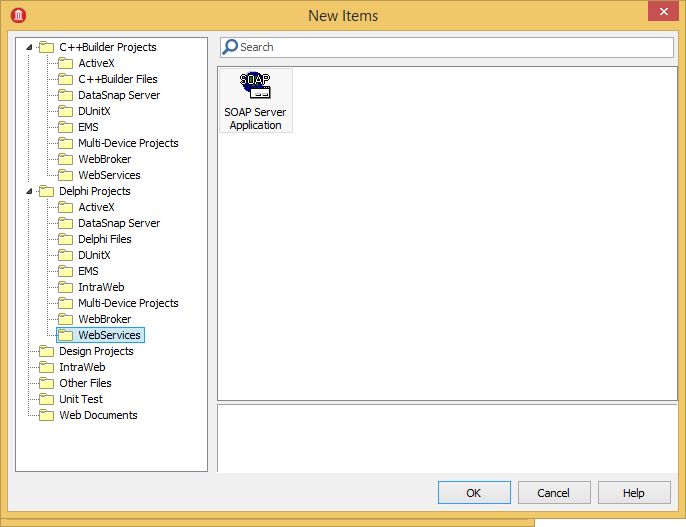
The Wizard which is presented offers several options. The most common way to host a SOAP service is as a web server module, such as an “ISAPI dynamic link library” for Microsoft’s “IIS” web server.
*Note: When creating an ISAPI using 32-bit versions of the compiler, you’ll need to alter a setting under the IIS application pool in order to enable 32-bit executable code on a 64-bit server. Set your compile target to 64-bit in modern versions of Delphi to avoid this.
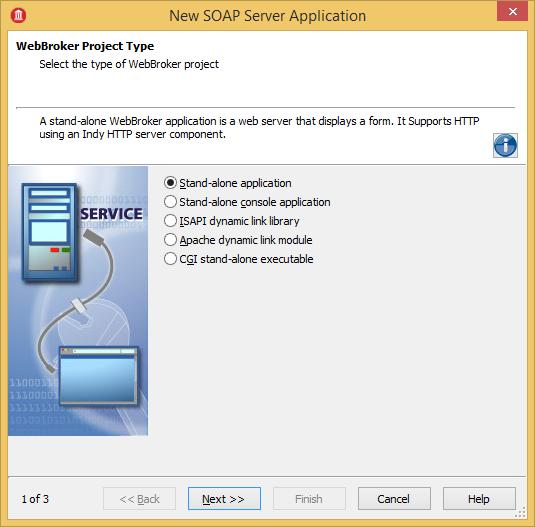
For the purposes of this instruction however, we’re going to select “Stand-alone application.” It’s relatively trivial to convert this project into an ISAPI project, which I’ll demonstrate later. For now, go ahead and select “Stand-alone application.”
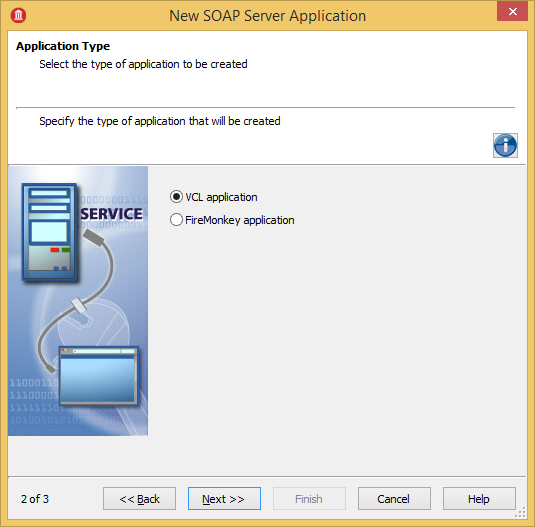
The next stage in the wizard asks you if you’d like to use the “VCL” or “FMX” / “Firemonkey” frameworks behind your web service code. There’s little distinction between “VCL” and “FMX” for non-visual code on the windows platform, so lets stick to good old trusty “VCL”.
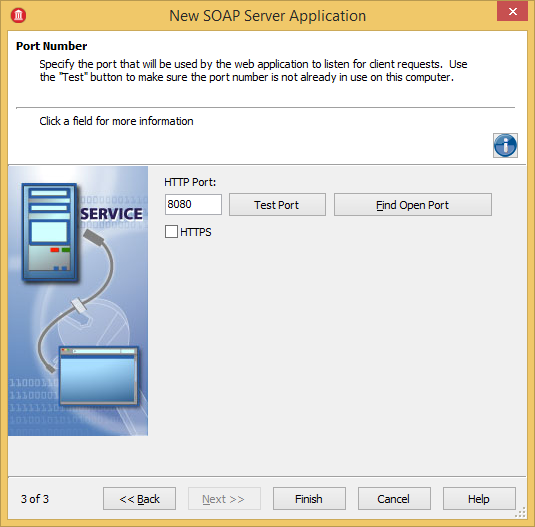
The next step of the wizard allows you to select the port number which your stand-alone executable service will run on. When this project is converted into an IIS or other web server application later, the port will be whichever port the web server is running the DLL on (typically 80/8080/443 for HTTP or HTTPS). Therefore, the port number we select here doesn’t matter too much, so long as it doesn’t clash with some other service running on the same machine. You can test for this with the “Test Port” button. I’m going to stick to port 8080, if you select a different port you’ll need to adjust any url’s that I give you later.
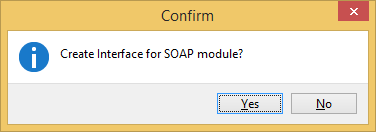
After you click on “Finish” from the wizard, Delphi will go to work constructing your SOAP server application project. When it’s close to finished it will present the following dialog…

This dialog is asking you if you’d like to create an “end-point” for your web service, or at least that’s what it’s called in some other SOAP frameworks I’ve encountered. Such frameworks typically only allow you to host a single end-point per service, at least without some configuration, but Delphi will permit you to host as many as you like. For this service to be useful at all, you must add at least one, so go ahead and click “YES”.
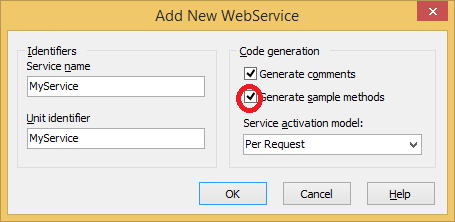
The next dialog is where you’ll name the service end-point that you’re going to create. On this dialog you also have the option to add some sample methods, which will be unchecked by default. Make sure this option is checked, as we’re going to use the sample methods later.
Delphi will have now created a service application for you, and it’s a complete working service with some sample methods for you to call too. Before we take a look at the service, lets set up some directories and save the project.
We’re going to be creating three different projects in total. The first, we’ve just created. This is the server side application. A second will be an ISAPI version of the same service (since I promised I’d show you how). The third will be a client application capable of calling the service. We’ll add all three to a project group.
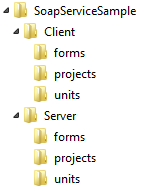
Somewhere on your disk (it doesn’t matter much where, where-ever you usually keep your projects), create the following directory structure…
Save the files as follows…
- \SoapServiceSample\Server\units\MyServiceIntf.pas
- \SoapServiceSample\Server\units\MyServiceImpl.pas
- \SoapServiceSample\Server\forms\FormUnit1.pas
- \SoapServiceSample\Server\units\WebModuleUnit1.pas
- \SoapServiceSample\Server\projects\StandAloneService.dproj
Be sure to note the changes in directory, and that I’ve renamed the project to “StandAloneService.dproj”
The purpose of these files is as follows…
- MyServiceIntf.pas – The interface part of your service, used to generate the WSDL file.
- MyServiceImpl.pas – The implementation of your service.
- FormUnit1.pas – Used to provide a UI for the stand-alone service application, this is not relevant when converting to ISAPI or Apache modules.
- WebModuleUnit.pas – The web module hosts your service end-points (interface+implementation), and marshals requests to them through URL mapping.
- StandAloneService.dproj – The project file.
Now we’re ready to see the service in action for the first time. Go ahead and run the application. You should see the following…
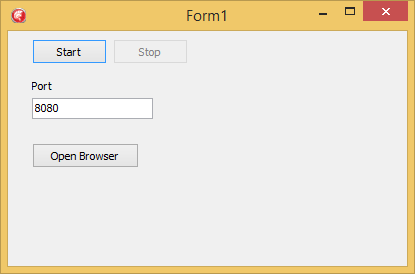
Not the prettiest looking application is it? But it need not be, because this application is merely the stand-alone service application which we’ll be using to debug the service.
Click on the “Start” button to start the service running (accept any security warnings regarding the firewall), and then click on “Open Browser”…
*Note, if for any reason your browser does not open, which can happen depending on your setup, open a browser and navigate to http://localhost:8080

What you can see in the browser is a HTML based interface to your service. There are two interfaces published, ‘IMyService’ and ‘IWSDLPublish’ of which, the first is your new service end-point and the later is a system generated end point for purposes we’ll not be delving into here.
If you click on the ‘[WSDL]’ link to the right of ‘IMyService’, you’ll see a large XML file produced. This file is the WSDL file which the client application will use to discover the capabilities of your service. Take note of the change in the URL bar when you do this…
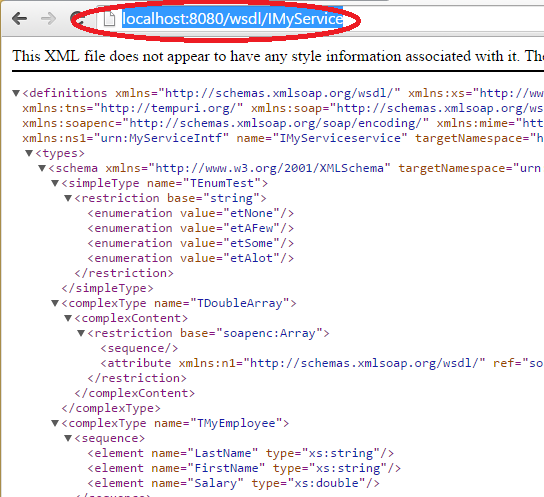
You’ll notice that ‘wsdl/IMyService’ has been added to the url string. This is how we address the wsdl file for any particular service end-point / interface that we create, simply append ‘wsdl/I<endpoint-name>’ to the base url. The WSDL provides details about what your service is capable of, and what data types (objects) it supports.
Before proceeding on to write a client application to consume this service, I’d like to point out a few things in the interface and implementation files. Go ahead and open ‘MyServiceIntf.pas’ in the IDE. Approaching the bottom of the file, you’ll see this interface being declared…
{ Invokable interfaces must derive from IInvokable }
  IMyService = interface(IInvokable)
  ['{C139A2E3-9927-431C-9D2A-C92AA934CD50}']

    { Methods of Invokable interface must not use the default }
    { calling convention; stdcall is recommended }
    function echoEnum(const Value: TEnumTest): TEnumTest; stdcall;
    function echoDoubleArray(const Value: TDoubleArray): TDoubleArray; stdcall;
    function echoMyEmployee(const Value: TMyEmployee): TMyEmployee; stdcall;
    function echoDouble(const Value: Double): Double; stdcall;
  end;
This is the interface which is used to create the WSDL file defining the capabilities of the service. Something to notice here is that the calling convention for each of the supported methods is ‘sdtcall’. That’s the windows standard calling convention, which is imposed on our service by the assumption that we’ll be converting it into an ISAPI module later. It’s safe to use ‘stdcall’ for apache modules and the stand-alone executable too, and so the IDE has assumed this calling convention for all services. Don’t forget to include it in both your interface, and implementation files when you’re writing your server-side methods.
Above the IMyService interface in this file, you’ll notice some data types being declared…
TEnumTest = (etNone, etAFew, etSome, etAlot);

  TDoubleArray = array of Double;

  TMyEmployee = class(TRemotable)
  private
    FLastName: AnsiString;
    FFirstName: AnsiString;
    FSalary: Double;
  published
    property LastName: AnsiString read FLastName write FLastName;
    property FirstName: AnsiString read FFirstName write FFirstName;
    property Salary: Double read FSalary write FSalary;
  end;
Simple data-types which map onto the basic Delphi data types do not need any special treatment. For example, ‘TEnumTest’ and ‘TDoubleArray’ are both simple data-types and will be mapped as required onto the WSDL file. Classes, however, must be derived from ‘TRemotable’ as can be seen here with ‘TMyEmployee.’
Deriving ‘TRemotable’ is required so that the base class ‘TRemotable’ can use RTTI (run time type information) to read the members of descendant classes and make them ‘remotable’, that-is, they can be serialized into, and deserialized out, of web streams. This allows you to send a ‘TRemotable’ class to your service, or receive one back from it. Only published properties can be read/written to the stream, and there would be little point putting methods on these classes, so use them as simple data transport classes and write helpers to work with them.
Now switch to the ‘MyServiceImpl.pas’ file to see the implementation of this interface. Notice that each of the methods has a corresponding method in the ‘TMyService’ class, which implements the ‘IMyService’ interface. Each of those methods is an stdcall, and, they each do nothing more than echo the data that the receive back to the caller.
You can test out more adventurous implementations later, but for now, we’ll stick with these sample methods generated by the project wizard. However, there’s a problem!
If you take a look at the sample method ‘echoMyEmployee’ generated by the wizard, you’ll notice that it creates a ‘TMyEmployee’ as it’s result, but it does not copy the values of the ‘Value’ parameter into it for echoing. We need to patch that up, so replace the implementation of ‘TMyService.echoMyEmployee()’ with the following code.
function TMyService.echoMyEmployee(const Value: TMyEmployee): TMyEmployee; stdcall;
begin
  { TODO : Implement method echoMyEmployee }
  Result := TMyEmployee.Create;
  Result.FirstName := Value.FirstName;
  Result.LastName := Value.LastName;
  Result.Salary := Value.Salary;
end;
Now our service is ready for consumption and testing.
Consuming a Soap Service
Now that we have a service to test against, lets build a client application to consume the service. Rather than start a new project from the main menu, we’ll build it inside the same project group as the StandAloneService project. That way, we’ll be able to run them both at the same time, and debug either.
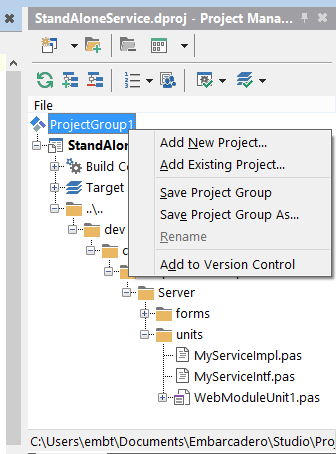
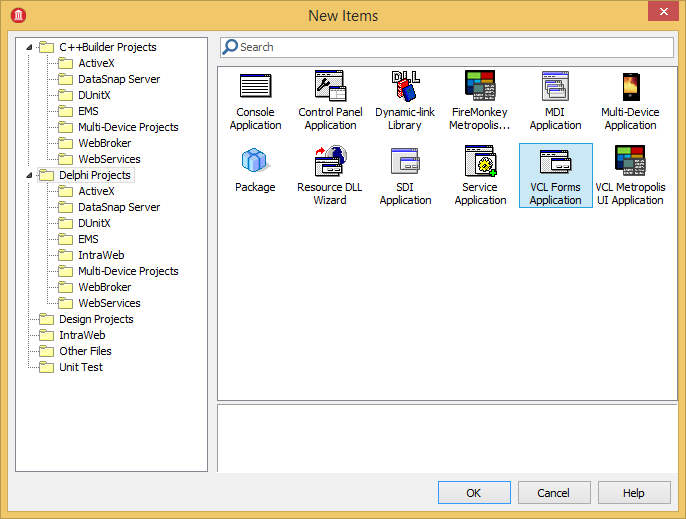
In the project explorer, right click on ‘ProjectGroup1’ and select ‘Add New Project’ -> ‘VCL Forms Application’
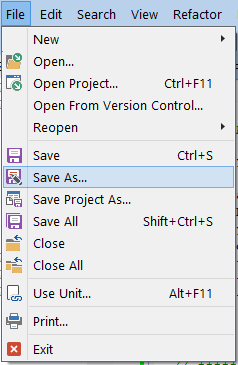
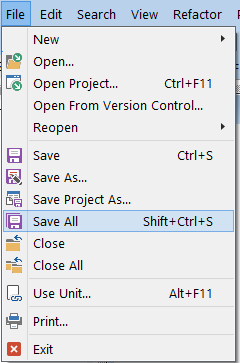
Now lets save the project into our directory structure, Select “File / Save Alll”…

Save the files as follows…
- \SoapServiceSample\Client\forms\formMain.pas (renamed from Unit2.pas)
- \SoapServiceSample\Client\projects\SOAPClient.dproj (renamed from Project<x>.pas)
- \SoapServiceSample\SoapGroup.groupproj (renamed from ProjectGroup1.groupproj)
From this point on, we can open multiple projects (server and client side) by opening the ‘SoapGroup.groupproj’ file.
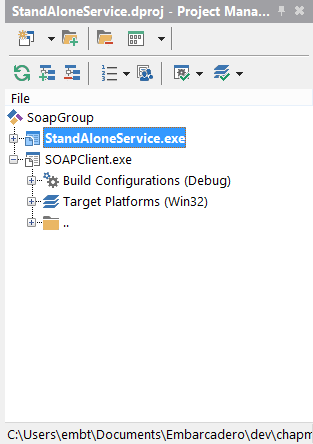
Now, in order to consume our web service, we need to import the WSDL file into our client application. In order to do this the service should be running, so in the project manager, double-click on ‘StandAloneService’to set it as the default project (highlighted bold).
Now run the project using the “Run without debugging” option. It’s important that you select this and not the “Run with debugging” option because while the IDE is debugging an application it won’t permit you to run another. This is made more important later when we want to run both the StandAloneService and SOAPClient projects at the same time. We’ll always be debugging one, while running the other without debugging.

Click on the start button to ensure the service is running and available.
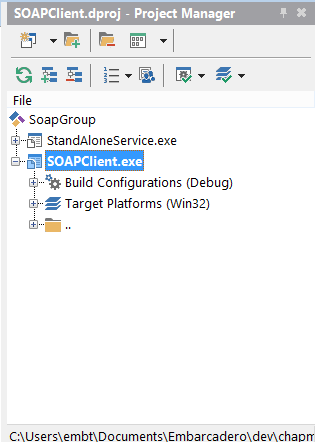
Leave this running, and back in the IDE, double click on the ‘SOAPClient.exe’ project in the project manager to set it as default.
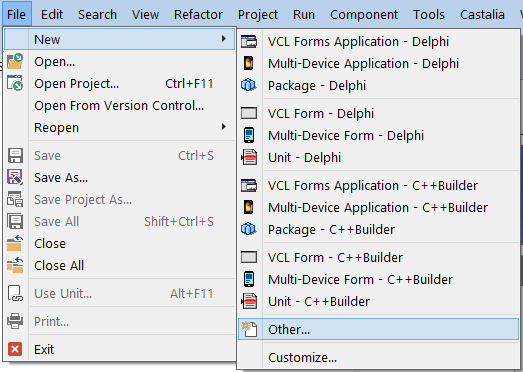
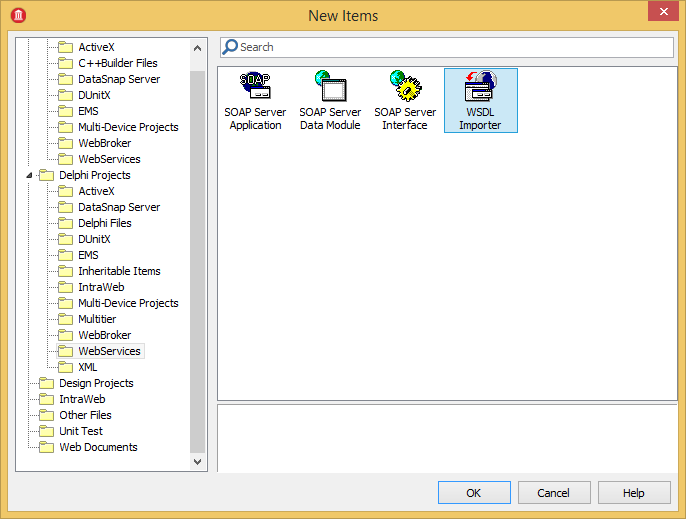
Now, head up to “File / New / Other -> Delphi Projects / WebServices / WSDL Importer”
(may vary with Delphi / Rad Studio version or edition. “Delphi Projects” step may need to be omitted.)
In the import wizard presented, paste the URL of the WSDL for the interface (end-point) that you wish to import from the service.
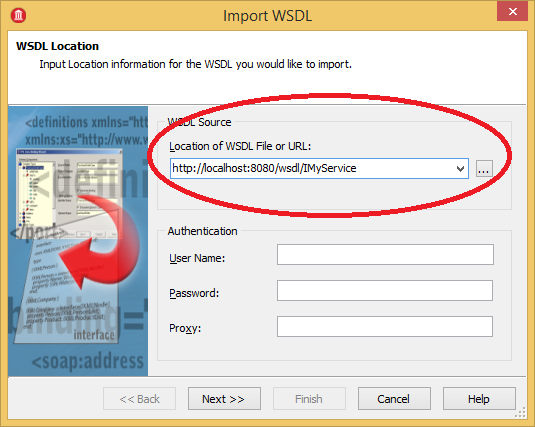
Leave the other options, unless you know that you’re using a proxy, and click next.
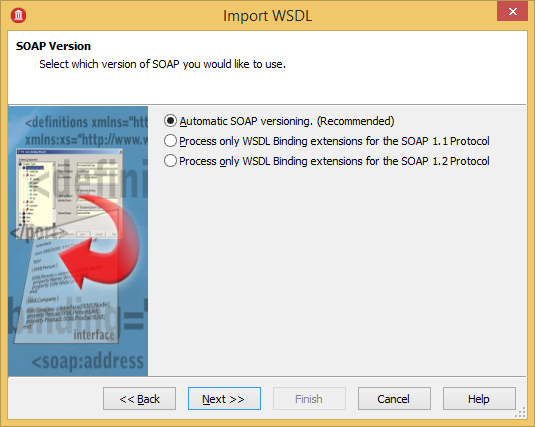
On the next wizard, simply click next and let the wizard worry about SOAP versioning for you…
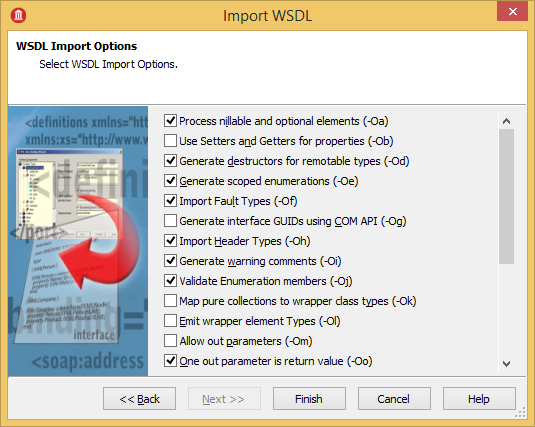
The next wizard page provides a weft of options which you can adjust to change the way that the WSDL parser functions. This enables you to import WSDL files which vary in their implementations, for Interoperability with other SOAP frameworks, including Microsofts WCF framework for example.
As we’re working with a Delphi SOAP service, we don’t need to alter any of these settings, so simply click ‘Finish’.
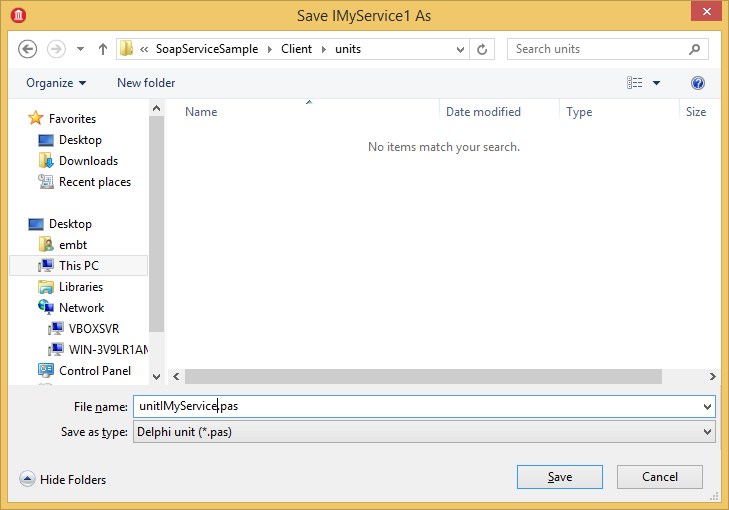
The Delphi IDE will now have created a new unit, which it has named “IMyService1” – I’m not a fan of this naming convention (using a “1”) and we can’t rename the unit to “IMyService” because there is already an identifier named “IMyService” within the unit. So lets save this file as “unitIMyService.pas” into “\SoapServiceSample\Client\units\unitIMyService.pas”
We now have everything we need within the client application in order to call the service we wrote earlier, but we don’t have any kind of UI for our application. Lets build one.
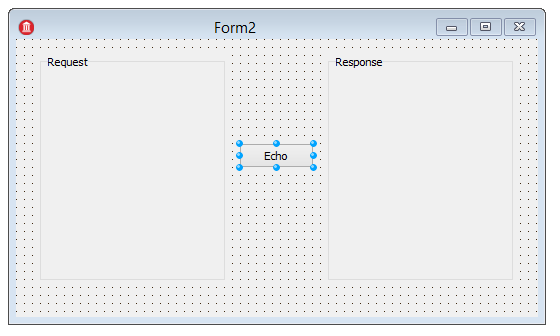
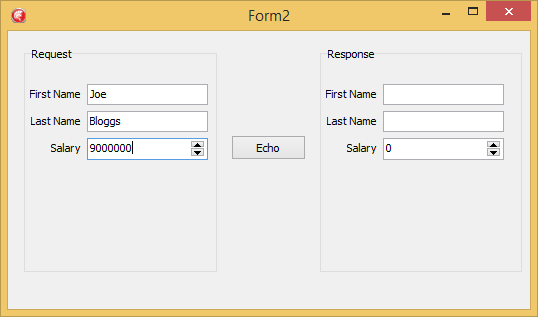
In the IDE, switch to formMain and drop two TGroupBox controls and a TButton control from the tool palette.
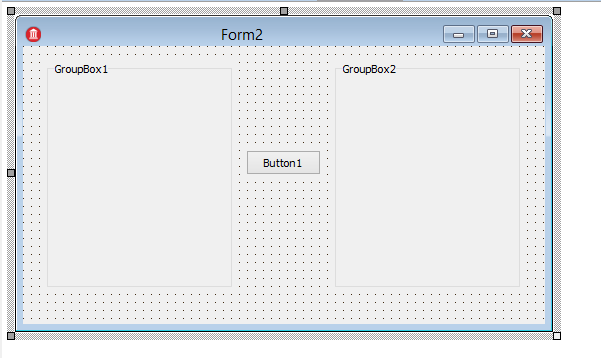
Set the ‘Caption’ property of each group box to read “Request” and “Response” respectively. Also, set the button ‘Caption’ property to read “Echo”
Into each group box, place three ‘TLabel’ controls, two ‘TEdit’ controls and a ‘TSpinEdit’ control, arranged as follows…
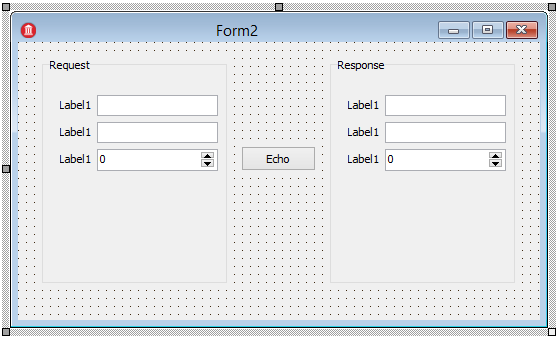
(*note your edit boxes may have text where mine do not, don’t worry about that.*)
Now we need to set the ‘Caption’ property of each of the labels inside the request box to read ‘First Name’ , ‘Last Name’, ‘Salary’ respectively. Repeat the same for the labels inside the response box. You may have to adjust the size and position of controls to make all the labels fit nicely.
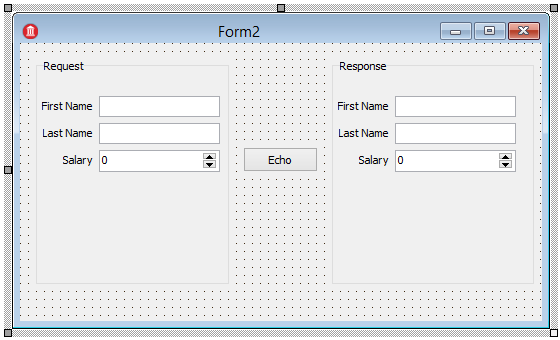
Now we set the ‘Name’ property of each of the edit, and spin edit controls. For those in the request box we’ll name them ‘edtReqFirstName’, ‘edtReqLastName’ and ‘spedReqSalary’ respectively. For those in the response box we’ll name them ‘edtResFirstName’, ‘edtResLastName’, ‘spedResSalary’. Also set the ‘Text’ property for each of the edit boxes to an empty string.
Finally, double click on the button to set it’s ‘OnClick’ handler, and insert the following code…
procedure TForm2.Button1Click(Sender: TObject);
var
  Service: IMyService;
  ReqEmployee: TMyEmployee;
  ResEmployee: TMyEmployee;
begin
  // capture interface to service
  Service := unitIMyService.GetIMyService();
  // build the request
  ReqEmployee := TMyEmployee.Create;
  try
    ReqEmployee.FirstName := edtReqFirstName.Text;
    ReqEmployee.LastName := edtReqLastName.Text;
    ReqEmployee.Salary := Trunc(spedReqSalary.Value);
    // Make the service request
    ResEmployee := Service.echoMyEmployee(ReqEmployee);
    try
      // Display the response
      edtResFirstName.Text := ResEmployee.FirstName;
      edtResLastName.Text := ResEmployee.LastName;
      spedResSalary.Value := Trunc(ResEmployee.Salary);
    finally
      ResEmployee.Free;
    end;
  finally
    ReqEmployee.Free;
  end;
end;
Also, remember to add unitIMyService to the uses list of the main form.
Now lets test this service.
Your ‘StandAloneService.exe’ server should still be running in the background, but if it isn’t, go and make it the default project in the project manager and hit the “Run without debugging” button. Don’t forget to click it’s “Start” button, and then come back to the IDE and set ‘SOAPClient.exe’ as the default project again.
Run the SOAPClient.exe project and you’ll be presented with the following…
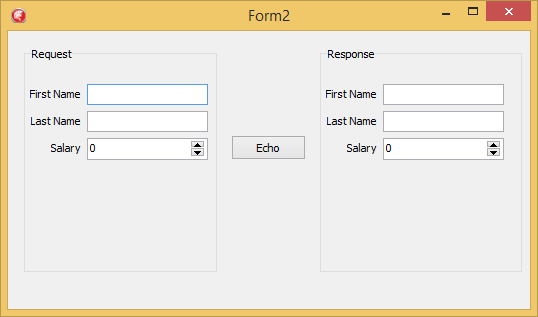
Go ahead and put in your first name, last name, and any number for a salary in the salary box under Request. *Note: I’ve clamped the salary box to integer values only for convenience, because I chose to use the ‘TSpinEdit’ control for this example.
Click the ‘Echo’ button.
If all has gone well you should see the following…
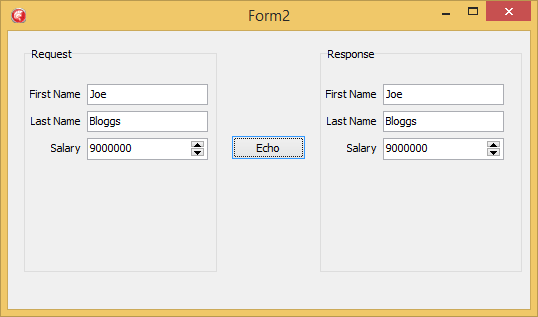
Exciting! Isn’t it? When you clicked that button, the values in the request box were packaged up and sent off to the servers ‘echoMyEmployee’ method, which copied them into a response and sent them back. The result was then unfolded into the response box.
You just successfully called your SOAP service, congratulations. This is where you should break from reading this and go experiment with making the ‘echoMyEmployee’ method more sophisticated, or perhaps add new methods of your own.
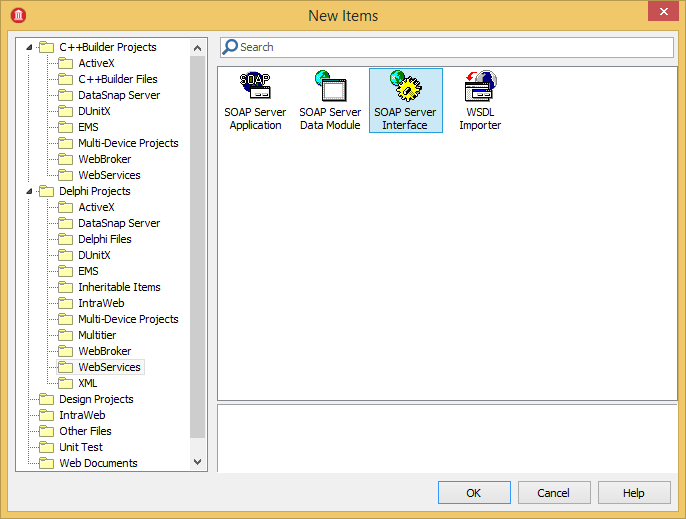
As a side note, you can add new interfaces (end-points) by setting the server project as the default project and then selecting “File / New / Other -> Delphi Projects -> Web Services -> SOAP Server Interface” and following the wizard.
When you’re done experimenting with new interfaces, new methods and making the service do any old thing you like, come back here and see how to turn it into an ISAP that you can package up for installation into an IIS server.
Building an ISAPI SOAP service for IIS
Towards the beginning of this post, I promised that I’d show you how to transfer your web service from the stand-alone service executable which we have built, to an ISAPI plugin for IIS server. So here it is.
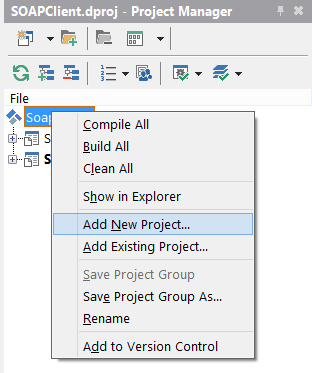
Open up the ‘SoapGroup’ project group that we created earlier, and in the project manager, right click on ‘SoapGroup’ and select ‘Add New Project’
Now select “Delphi Projects -> WebServices -> SOAP Server Application”

We’ve been through this wizard before, when creating a SOAP service as a stand alone service. This time however, we select “ISAPI dynamic link library” from this page of the wizard…

Run through the rest of the wizard as we did earlier, until you come to this dialog…
This time click “NO” because we already have an interface in the stand alone project that we wish to import.
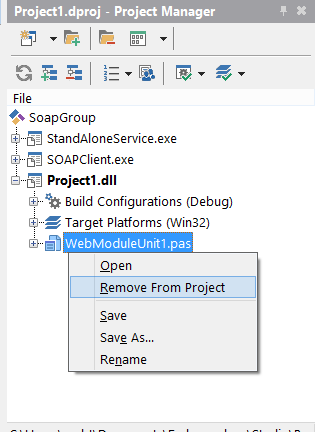
Now before saving your new project, right click on ‘WebModuleUnit1.pas’ in the project manager and select “Remove From Project”. Be certain that you’re removing this from the new project, and not the one under “StandAloneService.exe”
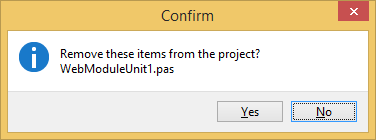
Two dialogs will be displayed, the first asking if you’re sure you want to remove the module from the project, click “YES”
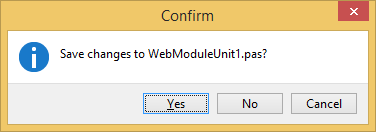
The second dialog asks if you want to save the module, we already have one in another project, which we’re planning to import. So tell this dialog “NO”
Now that the module is removed, go ahead and select Save All.
You know the drill, save the project file as “\SoapServiceSample\Server\projects\ISAPIService.pas”
You now have an ISAPI project, but it does nothing, has no modules to marshal requests to services, and no services to marshal them to. So we need to import these things from our previous stand alone project.
In the project manager, right click on your “ISAPIService.dll” project and select “Add” from the menu.
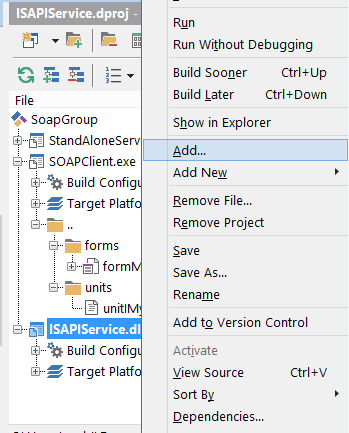
Navigate to ‘\SoapServiceSample\Server\units’ and select all three files..

Once you click “Open” you’ll see that the three files from the ‘StandAloneService.exe’ project are now a part of the ‘ISAPIService.dll’ project also.
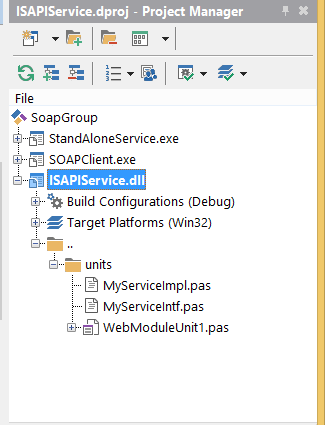
As an important note. The web module and interfaces are now shared between the two projects. This means that you can use the ‘StandAloneService.exe’ project inside the IDE debugger to test your service before uploading the ‘ISAPIService.dll’ file to your IIS server.
Should you add interfaces to either one project, you should use the “Add” option we used above, to import them into the other, and of course be aware that any other changes to these source files will affect both projects.
Right click on “ISAPIService.dll” and select “Build” from the menu that pops up.
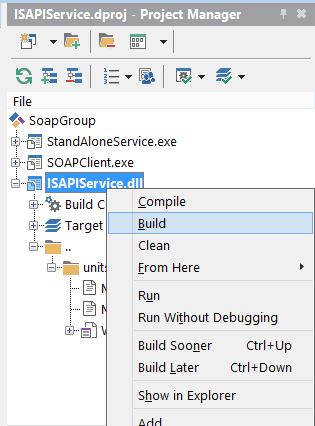
Once building is complete, go and take a look inside “\SoapServiceSample\Server\projects\Win32\Debug” and you’ll see a file named “ISAPIService.dll”
This is effectively the dll that you’ll want to upload to your IIS server. By default however, this is a 32-bit dll and was built using the debug build profile. Modern IIS servers are 64-bit servers, so go back into the IDE and add the 64-bit target, and a release build profile to your project.
Conclusion
That’s it.
You have a SOAP service in stand-alone and IIS plugin form, and a client application which can be used to test it.
Thanks for reading!
You should also read:
JSON with RadStudio Delphi or C++ Builder
An introduction to JSON and using it within RadStudio Delphi or C++ Builder. JSON (JavaScript Object Notation) is a popular format for the encapsulation of structured data. If you’re familiar with XML, you can consider JSON as doing the same job fundamentally, though the two are…
Continue reading...On SoA and SOAP and REST with WebBroker
There has been a lot of talk from Embarcadero recently, regarding their RAD Server product, which is an excellent product, but today I’d like to discuss a far older technology included with RadStudio and related products. Web Broker has been in Rad Studio since the…
Continue reading...Creating a Linux Daemon (service) in Delphi.
Edit: I originally wrote this post back in April 2017. Three months after I did, Paolo Rossi (MVP) also published a post on writing a Linux Daemon in Delphi entitled "Building a (real) Linux daemon with Delphi" I have to assume, given that Linux support…
Continue reading...Binding to dynamic libraries from your Delphi applications.
During one of my webinars this morning on migrating services from windows to Linux, a question was raised about how to import libraries to Delphi. In this post I’d like to explain what I’d done in that webinar in more detail, and show you how…
Continue reading...Configure Delphi and RedHat or Ubuntu for Linux development.
Image courtesy of Jim McKeeth. One of the more exciting features of the pending 10.2 release of Delphi and RAD Studio, is support for targeting Linux. In this post, I’m going to step you through setting up your development environment to deploy applications to either…
Continue reading...